+91 9953 65 9594
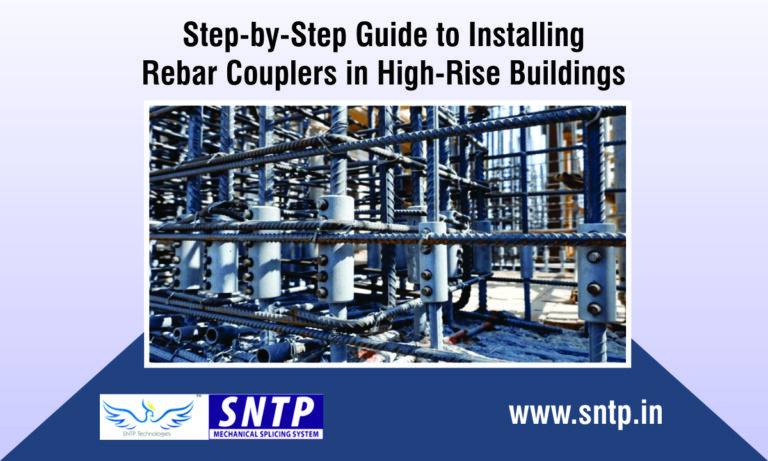
Step-by-Step Guide to Installing Rebar Couplers in High-Rise Buildings
In modern construction, Rebar couplers have revolutionized how engineers and builders connect reinforcement bars. Especially in high-rise buildings, where structural stability, strength, and precision are critical, rebar couplers provide a reliable and efficient solution to replace traditional lapping methods. Their ability to create continuous load transfer between rebars enhances the overall durability and safety of tall structures.
This comprehensive guide explains the step-by-step process of installing rebar couplers in high-rise construction projects, ensuring optimal performance, safety, and compliance with engineering standards.
Understanding Rebar Couplers
Before diving into the installation process, it’s important to understand what rebar couplers are and why they are essential.
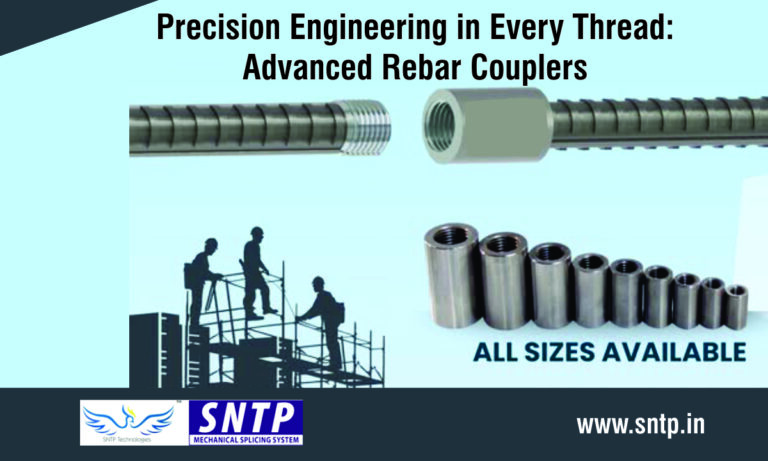
A rebar coupler is a mechanical connector that joins two steel reinforcement bars end-to-end, creating a continuous load path. Instead of overlapping steel bars (as in traditional lapping), couplers provide mechanical continuity, improving strength and reducing material wastage.
Advantages of Rebar Couplers in High-Rise Construction:
- Stronger and more consistent joints
- Reduced steel consumption
- Faster installation and project completion
- Better concrete flow due to reduced reinforcement congestion
- Enhanced seismic and load-bearing performance
SNTP Technologies®, India’s first BIS-certified company for rebar couplers, has set industry benchmarks by ensuring high-quality, precisely engineered connectors ideal for complex structures like skyscrapers, bridges, and tunnels.
Step-by-Step Installation Process
Installing rebar couplers correctly is crucial for ensuring their effectiveness and long-term performance. Below is a detailed step-by-step guide followed by professionals during high-rise construction.
Step 1: Preparation and Inspection of Rebars
Before installation, all rebars intended for coupling must be properly prepared.
Key actions include:
- Cutting the Rebar Ends: Use a rebar cutting machine to obtain clean, perpendicular cuts. Irregular or slanted ends can weaken the connection.
- Threading the Bars (if required): For threaded couplers, the ends of the rebars are threaded using a threading machine according to the coupler’s specifications.
- Cleaning: Remove oil, rust, dust, or debris from both the rebar and coupler surfaces to ensure perfect fitment.
- Inspection: Verify that the bar diameter and thread length comply with project and coupler specifications.
Tip: Always check coupler dimensions against the bar size to ensure compatibility before installation.
Step 2: Aligning the Rebars
Proper alignment ensures effective load transfer and prevents bending or stress concentration in the joint.
- Place the two rebars to be connected in a straight line.
- Ensure the centerlines of both bars match exactly.
- Use alignment fixtures or guiding tools when working in vertical or congested high-rise columns.
Any misalignment, even minor, can reduce the tensile strength of the joint and compromise structural safety.
Step 3: Connecting the First Rebar
Once alignment is achieved, start by connecting the first rebar to the coupler.
- Threaded Coupler: Screw the coupler onto the threaded end of the first rebar until it reaches the midpoint of the coupler.
- Swaged or Press-Fitted Coupler: Insert the bar into the coupler and use a hydraulic press or torque wrench to apply the required pressure.
- Grouted Coupler: Insert the bar and fill the sleeve with approved non-shrink grout.
Ensure that the bar is properly tightened, and the threads (if applicable) are fully engaged. Use a torque wrench to confirm that the specified tightening torque has been applied.
Step 4: Connecting the Second Rebar
Once the first rebar is securely fixed, connect the second bar in the same way.
- Align the second bar perfectly with the coupler opening.
- Screw or press the rebar into place until both bars meet at the coupler’s midpoint.
- Use proper torque control to ensure tightness.
After both bars are connected, double-check alignment and joint integrity before proceeding to the next stage.
Step 5: Tightening and Quality Verification
Once the coupler is in place, it must be checked to ensure the joint meets mechanical and structural requirements.
- Torque Testing: Use a calibrated torque wrench to ensure the coupler meets the required tightening torque.
- Visual Inspection: Check for thread exposure, misalignment, or gaps between the bars.
- Marking: After successful tightening, mark the coupler with paint or identification tape to confirm it has been tested and approved.
Quality verification is essential for safety, especially in high-rise projects where each connection contributes to the overall load-bearing capacity.
Step 6: Concrete Pouring and Protection
After installation, the couplers must be adequately protected during concreting.
- Ensure couplers are properly covered with concrete to prevent corrosion.
- Avoid direct contact of couplers with external moisture or chemicals.
- Use proper vibration during pouring to prevent air gaps around the coupler.
Adequate coverage enhances the longevity and performance of both the coupler and the structure.
Step 7: Post-Installation Testing and Documentation
Once installation is complete, post-installation tests verify the strength and reliability of the connections.
Common Tests Include:
- Tensile Test: Ensures couplers can withstand the designed load.
- Slip Test: Checks for any movement between the coupled bars under tension.
- Visual and Dimensional Inspection: Ensures couplers meet tolerance limits.
After testing, document all results, including test reports, inspection notes, and torque readings. This record is critical for project compliance and quality assurance.
Best Practices for Installing Rebar Couplers in High-Rise Structures
- Use Certified Couplers: Always use BIS-certified or equivalent quality couplers, such as those from SNTP Technologies, to ensure safety and compliance.
- Follow Manufacturer Guidelines: Every coupler type has specific torque, threading, and testing requirements—follow them carefully.
- Train Installation Teams: Proper training ensures consistent, error-free connections across multiple floors.
- Avoid Field Modifications: Never alter coupler dimensions or threading on-site.
- Regularly Inspect Tools and Equipment: Ensure threading machines, torque wrenches, and presses are calibrated and maintained.
- Environmental Protection: Store couplers in dry, shaded areas to prevent corrosion before use.
Implementing these practices ensures durability, performance, and safety in every installation.
Why Rebar Couplers Are Ideal for High-Rise Buildings
High-rise buildings require reinforcement systems capable of handling vertical loads, wind pressure, and seismic forces. Rebar couplers meet these challenges by:
- Ensuring Strong Vertical Continuity: They provide seamless load transfer across multiple floors.
- Reducing Steel Congestion: Easier to install in dense reinforcement areas.
- Enhancing Construction Speed: Simplifies bar placement and reduces labor time.
- Boosting Structural Safety: Offers consistent strength across all joints, reducing risk of joint failure.
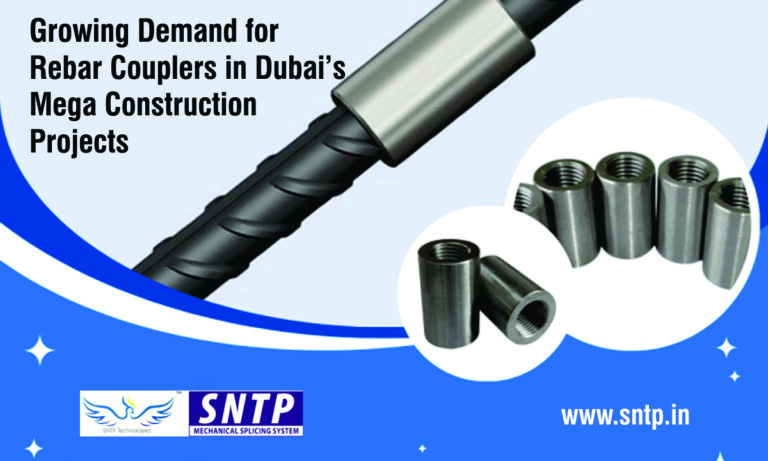
These advantages make rebar couplers the preferred choice for skyscrapers, bridges, and mega-infrastructure projects worldwide.
Conclusion
The installation of rebar couplers in high-rise buildings is a critical process that demands precision, quality control, and adherence to engineering standards. When installed correctly, these mechanical connectors not only improve structural strength and safety but also streamline the construction process, saving time and materials.
By following this step-by-step guide, builders can ensure efficient installation and long-term performance. With BIS-certified couplers from SNTP Technologies®, India’s trusted leader in reinforcement technology, every joint becomes a symbol of durability, safety, and engineering excellence—building the strong foundations of tomorrow’s skyline.
Recent Posts


© Copyright 2017.SNTP All Rights Reserved.
Design & Developed By Star Web Maker